Ethanol Sux a motorcycle post finally

EthanolSuxTheProblem

Their lots of studies and opinions on the use of Ethanol in gasoline. My opinion is that it sux especially if you let your motorcycle sit due to outside factors. This is even more an issue with a metal gas tank on the motorcycle like my KLR650. Ethanol is hygroscopic and several studies show that no additive can fix this. Therefore if you let ethanol gas sit you are going to have issues as it pulls moisture from the air and sits until phase separation happens. Then the corrosive gel of water and ethanol goes to work. Lots of sources say less than 4 weeks for phase separation so a carbureted bike is even more at risk if you do not drain. DRAIN that tank and float bowl is the only real solution.

For reference. No Additive will help you completely.

The Issue:

High moisture fuel left in the metal tank causes rust and ethanol phase separation causes water ethanol gel to be trapped in the bottom of the tank making it worse. You know right by the petcock that feeds the carb, so It also plays heck with carburetors. Phase separation leaves that nonflammable gel in your float bowl to clog your idle jets too. I have not opened that can of yuk yet.

You can see below the rust collected from inside the tank, about 1/2 inch in the bucket. The funk in the tank before I started. The extra step to remove all the rust that turned white vinegar brown.

The Solution:

EthanolSuxTheSolution

I hope this is the solution to my issues. The were several brands of liners but I just went with the amazon reviews. I am impressed so far as kbs-coatings support was very helpful. I did panic and get an extra 8oz of coating, but it was not needed. The KLR650 tank says it is larger that 5 gallons, but I have never gotten more that 5.1 gallons in it. I did as noted above use a extra pass with vinegar to remove all the rust prior to their RustBlast (Phosphoric acid and zinc phosphate pre-primer).

I have not cleaned out the carb yet. but that is a known issue and easy to do. knock knock. Well anytime you let it sit over 4 weeks you will get phase separation so you get good a idle jet cleaning.

The Results:

I got out the bore scope to ensure I got even coverage and that I did not need the second can. The KLR650 tank is an ugly shape inside, so it was hard to see otherwise. Here are some results. Fortunately the tank did not leak or had not rusted through. There are some thick spots in the welded seams that did bubble but look coated in the pit of the bubbles. There are two spots that look like the coverage is not complete along both sides of the saddle hump in the nose of the tank, but I don’t know that I can get the coating there anyhow. The vent pipe got coated too which is nice.

I also let the coating cure an extra long time as I was worried about temperature and humidity. It is TX after all. KBS coatings support was super supportive of my questions about the risk of temperature and humidity on curing times. Please be advised this is not a TX summer project. 55°- 82°F (13°- 28°C) is the recommended temp range for installation and low humidity helps as it is a moisture curing urethane. 6 hours till dry and 5 days to fully cure. I caught a break and got a mid to high 70’s spring morning with < 50% humidity right before a normal TX spring week of hot and rainy. I would have loved lower temps and humidity to get a longer working time, but was too chicken to do it in the house.

I just error-ed on longer to cure post install to be safe. Ok, I got caught up in life you know distracted…..Isn’t that what got me into this mess? Now what to do with two gallons of phase separated E10 gas sludge that I removed from the tank prior to cleaning. Glad it was not the full 5 gallons…:( how long did it sit to evaporate that much and rust that bad?
Hydroponic Garden Automation and Monitoring

HydroGardenAutomation_main

Normally my hobbies get mixed up. I had been playing around with Home Assistant to automate my house. Yes my projects are always on the shoulders of others, and the Home assistant folks make a great open source tool that is mostly easy to use, and runs on a RaspberryPi with a pre-built image. My Hydroponic Garden got two great advances from this, Automation and Monitoring.

Background for independent automation

Reddit is surprisingly great community for hobbyist you can find lots of useful hints there. I found this one about Topgreener Wifi Smart Plugs that were available on Amazon for a great deal. They stopped selling the 4 packs and sell the 2 packs for the same price as 4, so no link. It mentions you can use the tuya convert to update them to ESPHome without having to crack them open and “upgrade” the firmware manually. Another user also provides information on how to get the Energy Monitoring working. The best part is once you upgrade them they no longer require talking to the “mother ship.” Home automation without the cloud or proprietary apps that call home.

Automation upgrades

HydroGardenAutomation_main

The Hydroponic Garden got its own dashboard to control the automation of the lights and pumps. This is a much better solution than the old plug timers that would not keep time after a power outage. My neighborhood suffers from poor power reliability, but since all the devices run network time. It gets reset after outage so my lights run consistently.

Monitoring Upgrades

The upgrade of the firmware on the Top Greener TGWF115PQM plugs was super simple after reviewing the Reddit post linked above. This allows me to monitor the power used by my HydroGarden and ensure the Mars-Hydro lights are not getting too old. I’m still running my original burple reflector lights from 2018, so if it ain’t broke no need to fix it. They are still very good lights that use under 250 W and Home Assistant provides great graphs to track the overall Total Daily Energy consumption.

I also get to monitor the Temperature which is why Hydroponics is a winter only hobby for me. I cannot pay to heat up my house with LED lights and then use Air Conditioning to cool it down and remove the excess Humidity. This is provided by a ESP01/8266 and a DHT11 temperature sensor that I got from Amazon of course as the shipping times direct from China are still broken. I would love to not pay the amazon tax and get directly from AliExpress since they have the same vendors.

Well yet another reason I’m a of all trades and master of none. Hobbies require too many disciplines to be the best at any one.

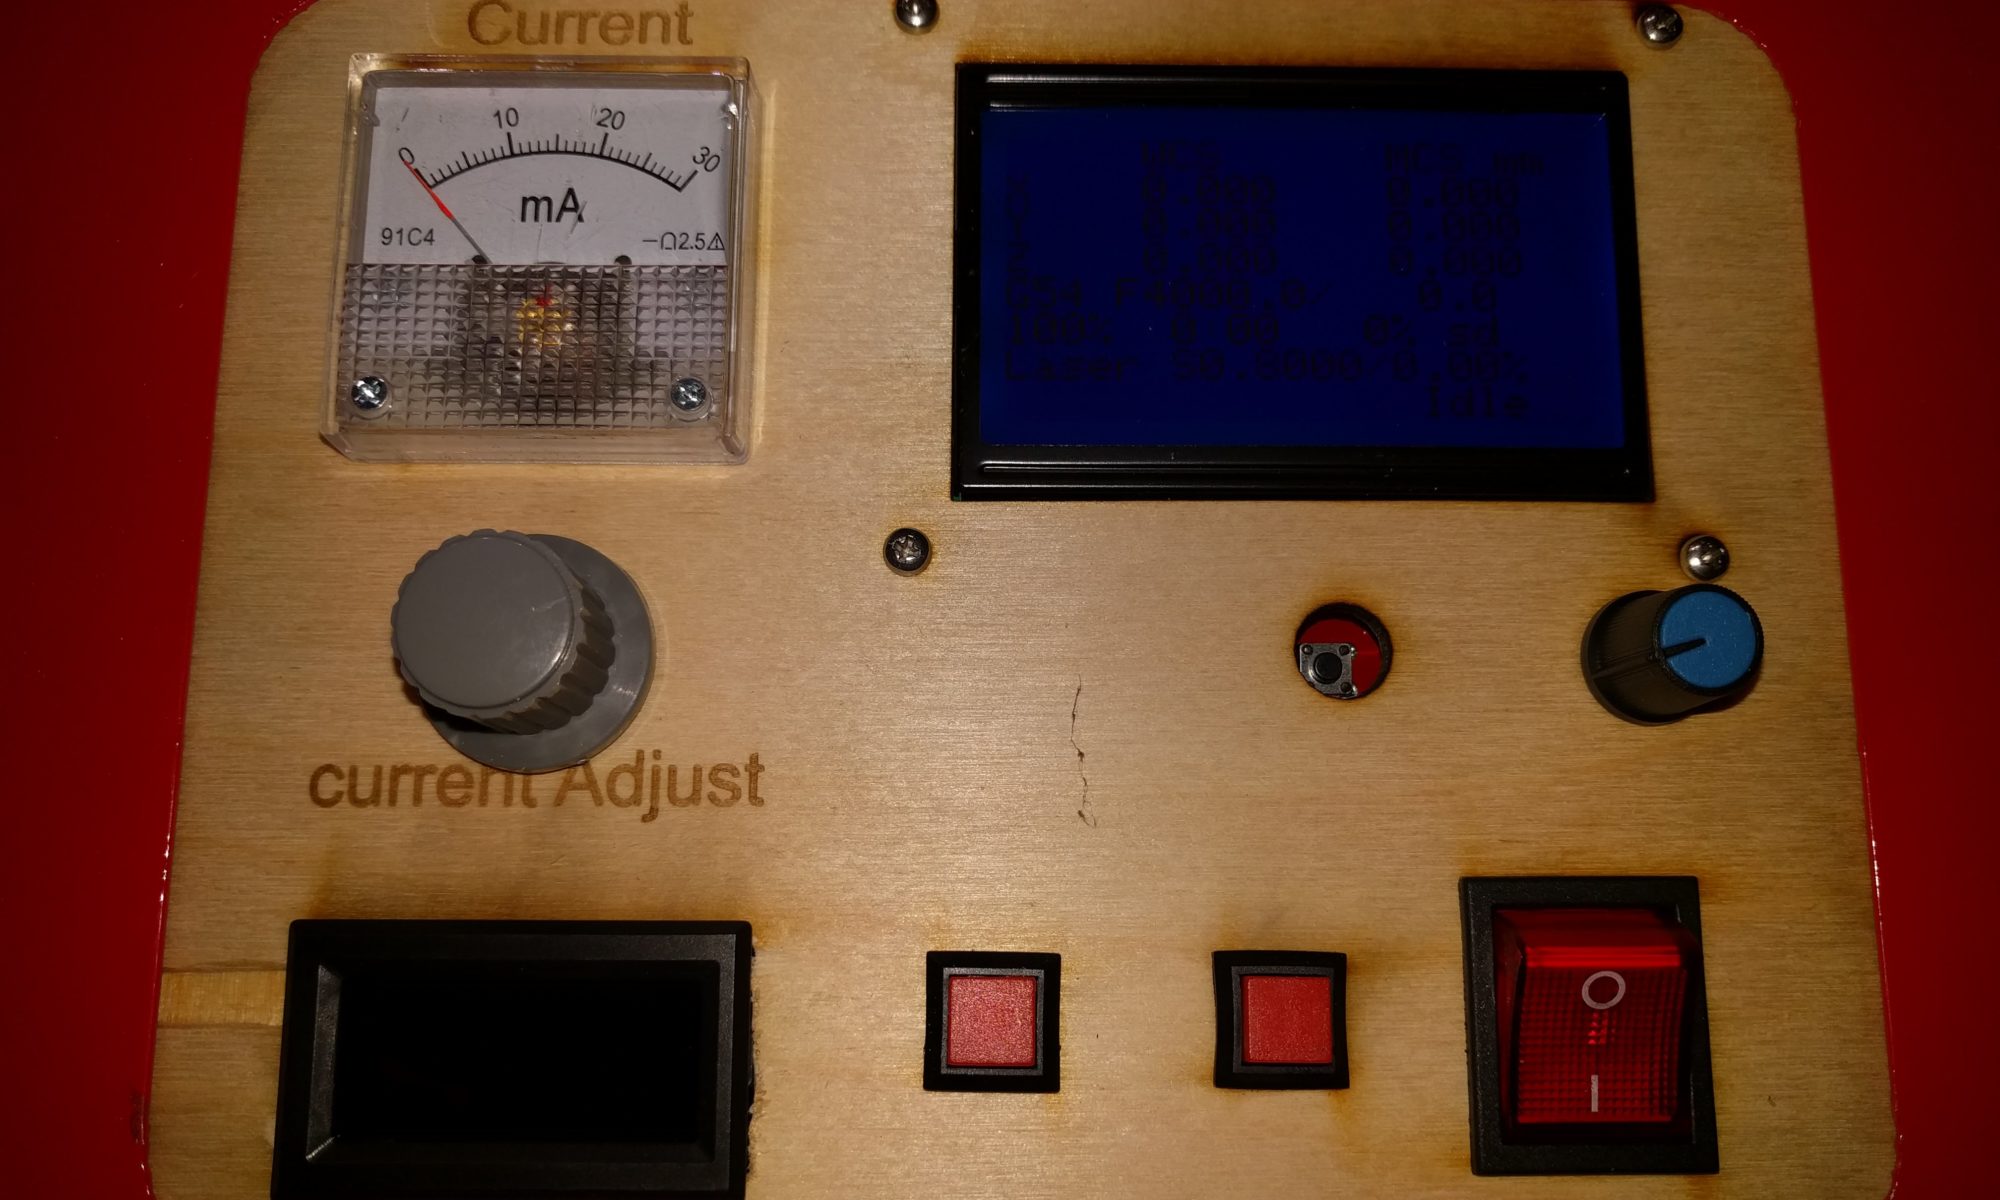
K40 gets some long overdue upgrades and testing

K40_overdue_updates_head

I have had some upgrades sitting on the shelf for a long time for the K40 laser cutter I got years ago. Some have been around since I originally got the machine, but I wanted to get all the life from the stock parts. I finally installed them.

The upgrades.

K40_overdue_updates_lenses
  • LightObjects Air assist head
  • 18mm ZnSe 50.8mm FL lens
  • fresh 20mm primary mirror
  • 5mp USB camera for Lightburn

Just a short list but they make a big difference over the stock 12mm lens and head. I got them installed along with a 5mp camera to pair with Lightburn to assist with object positioning.

If you are not running Lightburn software with your laser cutter. You should be. It is bar none the best with very responsive development team. I am a big supporter of open source, but pay for the license to support those guys. It is worth it, and my contribution via renewal barely buys them beers. You cannot go wrong for the price and what you get with a responsive development team. They read their forum and answer questions. The great folks at LightBurn also make their 3d model available for the 5mp camera holder, and will sell you one from their store if you don’t have a printer. It was a bit too tall for the LightObject Air assist head, so I had to go low profile with this model from Prusa Printers dot org. I’m still fiddling with the knobs on the calibration but visual location of cuts is going to be a game changer. I can cut small object from scraps now.

Testing the new Stuff

Prior to the upgrades my K40 had issues with living hinge cutting. It may have been my settings or focal length setting. However the new Air Assist head and Z-table combined to make a great hinge with minor scorching which was my big issue before. Charcoal does not flex well. Big shout out to DenzilMakes.com for the great test file box. You should check out his very nice work. There are lots of cool designs on the site. It made it look easy because he did all the hard work. There are even instructions on assembly available via his blog.

Sneak Peak for the future.

I did this long over due blog update while I was waiting for a fresh compile of OpenCV. I have been wanting to Open Computer Vision to convert stereo images to point clouds for a long while, for 3D modeling of real life. Well as a cheapskate, I could not justify buying a 3D scanner or Stereo Camera. What to do? Well check the parts drawer for what I have. A plain RaspberryPi zero and a RaspberryPi Zero W had been gifted to me years ago by a friend who wanted more power. I had some “Original” V1 camera modules to, well maybe they are knockoffs, but I cannot tell. The final physical piece was an OTG data transfer cable for cell phones. This will provide better resolution that my failed ESP32CAM attempt. I really should document failures too.

I got the basic Pi on the network by connecting it to the Pi W via the Ethernet gadget. I followed Adafruit’s guide for the most part. I had to do static IP addressing on the USB0 network on both of the Pies, and a little iptables forwarding. Note do not forget to enable forwarding in the /etc/sysconf.conf. I got everything working, after fighting with the camera cables a bit.

I then used Max Davaev of PiKVM’s great ustreamer to get the cameras accessible to the network for stream capture. This low latency streamer is just the ticket for the lightweight Pi’s, but full frame rate video may be a bit much for the available memory. Single image capture however is very responsive at full resolution.

I worked on my industrial design and worked on a FreeCad parametric model of a “case” for the things and it only took 3 revisions to get it usable. The cameras are 66mm apart or the normal human eye spacing, but the design will support up to 110mm for better stereo vision. I didn’t cut out the lens opening for the wider setting, but the design is parametric so one edit on the spreadsheet and a re-export and conversion of the STL into a SVG for the laser cutter. Props to tinker cad for the easy conversion from stl to svg via import and export.

I hope to update once I get some point clouds captured and converted to meshes. I hope to spawn the mesh processing onto the ARM BigLittle cluster which recently got a OS upgrade. end of word vomit… I saw a great makers site that is short sweet and too the point. I should really copy that style. “raw data for raw nerves

Raspberry PiCase Overkill

Pi_case_finished

Scope creep is a project issue many of us have. I always creep when I decide to mix media of my hobbies. This one gets 3 of the many hobbies.

I started with the idea to build a simple plywood box to carry a Raspberry Pi and some associated tools for on the go hardware troubleshooting. What did I get? A leather wrapped treasure chest of troubleshooting tools. I wanted to have a “pirate chest” motif with a “sample case” style flap opening that could hold the keyboard and tools. It had to highlight the “edge grain” of the plywood too. I may have gotten close on the aesthetic I wanted, but the scope creep made this more than a simple case.

Pi_case_stuffed_messy

The Contents of the box before cable management.

The Raspberry Pi 4 is setup with the stock OS with my favorite Sigrok and pulseview setup for the fx2lafw compatible logic analyzer. Sigrok/Pulseview is my go to tool for troubleshooting serial, i2c, and 2 wire things. I have also added my buspirate v3 inside the case for good measure, but don’t mess with JTAG much anymore. Arduino IDE is also installed including the ESP32 and ESP 8266 stuff setup as well. More on those projects to come.

PiCase woodworking

I wanted to highlight the “edge grain” of the plywood, so I used my Milescraft saw guide to cut the 18mm (3/4 inch) Baltic Birch plywood into strips and re-laminated it back together to make panels that show the “grain.” That inexpensive saw guide amazes me with the consistency and ease of use for the small price. I then box jointed the bottom for extra glue area strength and inset supports for the contents. I left the top open so the leather skin could wrap and form a rounded top. I also decided to skin the outside of the wooden carcuss with 3mm Baltic Birch plywood for extra support of the leather. Of course I used Danish Oil on the wood because it highlighted the layers.

PiCase Leather work

Springfield Leather Company always confuses me. I bought a 2-3 ounce grade “D” veg tan leather side to use for structural reinforcement for some other projects from them. It was nice enough that I started dreaming up this leather case. The description definitely under sold the quality of this 33 square foot discount side. It will make great stiffeners for other things, but made some nice “show” panels for this case. I could not justify cutting up the bend area to get the brand mark on this case, but thought about it. These mostly clean panels came off the shoulder area. I love leather for the character that it was once a live animal. If I wanted perfect I would use vinyl.

A quick swipe with the strap cutter to make some accent strips and some Fiebing’s Pro Dye in chocolate. It made the accents and I tried a new Renia Aquilim 315 contact cement to assemble and attach the panels to the case. I do like the water based cement and did not have to get “high” to make this project. Saving the last few brain cells is always good. I added some copper cut nails as accents to add to my pirate motif, as well as some snaps and a buckle to keep the sample case flap closed. I of course treated the leather with my Leather Balm V0.1.

PiCase finsh

Pi_case_leather_installed

It was a fun project that started from a simple idea to a joecad 1 cm = 1 inch scale drawing. Oh yes, I mixed metric and “freedom units” in my build. I initially did a FreeCad mock up of a wooden case, before unrolling the leather and getting scope creep and deciding on changing my design from a simple plywood box to a leather wrapped treasure chest of troubleshooting tools. I may consider adding a TS80 USB Iron to the kit, but that is just more scope creep.

It will not replace my “lab” workbench but it is mobile.

K40 for the Holidays and votive lanterns.

Candle_lantern_Nativity_SBJ

I’ve been in an odd holiday mood, and I am just as shocked as those people who know me. I normally get my Humbug on early and finish strong, so this early season spirt is an odd one.

Candle Lantern

I have been kicking around the idea and did a quick search on thingaverse and found thing 2755535, “Decorative LED Votive Lantern”. I loaded the thing up in Lightburn and sent it to the Cohesion3d Mini I had installed in my K40. Like magic the samples came out, and fit up nice. I got some LED Votives for them for safety. They are pretty nice for the less than half a kong buck price if you buy a pile. You cannot get the coin cell batteries for that to make your own.

Nativity Scene Votive Holder.

So now to satisfy my Christmas holiday mood I found some SVG files on Pixabay.com. The first was a Nativity Figures which I added the Star of Bethlehem and remixed the Thingaverse model in Boxy-SVG. I then fired up the Orion Motor Tech K40 with mods and presto like magic. Three wise men and their 3 camels visiting Mary, Joseph, a shepard, and his live stock all paying homage to Sweet Baby Jesus. The openings display images on the room backdrop.

Bonus Holiday spirt for others

Not everyone likes Sweet Baby Jesus holiday themes, so I gave thingaverse a search and found thing 603237. The Tie Fighter & X-Wing Laser Cut Ornaments were a bit hard to part out as they have tabs. But once freed from the card Tree Ornaments were had.

Now to decide if I should rush out some samples to all the friends and family for the Holidays…..

Box of fabric shorts learning

Box of fabric shorts August 1029 box

Almost every order from Sailrite, I throw in a box of fabric shorts, as it is a great challenge to me to make something from the highly discounted fabrics inside. I never know what I will find inside, but they have been great fun. Previous boxes have yielded trix-or-treat-market-tote market-totes-again The August 2019 box was especially fun, and here are the things I built to learn.

Box of fabric shorts first piece

I got a great solid oak table as a hand me down from a friend, but my backside needed relief. I made some cushions for it. It was great practice for zipper plaques and getting the pattern to line up on the edge consistently. It was odd as the fabric had an 10 inch repeat on an 12 inch cushion.

Box of fabric shorts second piece

The second piece out of the box was twenty seven inches of a nice vinyl coated fabric. I decided it would be a great protective bag for my folding solar panes for my Off grid Solar setup. Planning and layout was a challenge as the panels even folded are 24 inches square.

Once the plan was done and the pieces cut. I assembled them including a zipper plaque and continuous zipper install. The thin strip is the 24 by 1/2 inch remnant of the original piece it was a tight fit.

Once I got it sewn I turned it out and tested the panel fit. Perfect all 300 watts, or three by 100 watt panels and the extension cord fit inside perfectly.

Box of fabric shorts Still surprises in the box

There is a lot of learning and fun in the box still.

LaserCutter Z-table upgrade

lasercutter_TX

Just a little catch up on the documentation of projects. I was not in a rush as Cohesion3D has pretty complete instructions on the upgrade. It is a LightObject Z-table for my K40 laser.

I had pretty much installed the Cohesion 3D controler day one, but did not get the z-table installed until later. I cannot stress how easy the Cohesion3D mini has made using the K40 with the optinal LightBurn license. The upgrade to Z table required a high current stepper motor driver as well as an extra power supply to handle the extra power draw of the Z-table but the link above for instructions covered everything. I also got a spotting laser and some honeycomb bed installed. The honeycomb keeps objects from falling into the void. Testing shows it was very capable after the install. I have some minor annoyances to resolve like it homes the z-table between cuts which can be a time waster.

Trix or Treat Market Tote

market tote

I watched Sailrite’s Market Tote howto which was the basis for the Insulated trix or treat tote bag.   The Halloween color scheme was great.  You got to have a way to keep the beer cold while your trick or treating.

I had been trying the blue apron meals for recipe ideas.  However there was a lot of packaging in getting  meal ingredients delivered.   It piles up when you don’t have curb side recycling.   Well the knock off reflectix was just begging for a project not quite electronics upcycling but recycling is good.

low R value insulation
recycling the Blue apron packing

The tote was kind of built on the fly.    It is hard to make a pattern when using scraps and recycling materials.    It came out pretty nice.  A bit crooked on one seam as the faux leatherette slipped a bit.  I will need some more projects before I get into the fresh leather.   You don’t want to make a mistake in leather and have extra holes.

The box of shorts had some fun inside.


Off-Grid Solar setup scope creep.

off grid solar generator

I recently re-visited an old project to do some updates that were long overdue.  I finally got the battery guard and the USB charging ports installed and setup.   It is nice to have a low voltage cutout to protect the batteries from 12 volt attachments.   The inverter already had a protection circuit.

Updates always incur some issues with organization.   The main box which contains the MPPT solar charge controller and the bus bars that connect the two battery boxes with the box with the inverter charger and transfer switch.  Seems to have become a rats-nest of wire now.  If I would have know I would have gotten longer copper bars for the bus, but for my desired ampacity it would have cost a small fortune to go up in size.   Also the larger size would have been harder to drill as copper work hardens.     Finally I can get the polycarbonate shield cut to add extra layer of safety.

charge controller box
more cables more nest

  1. Box one Distribution
    1. 30A MPPT solar charge controller.
    2. Bus bar to connect everything
    3. 2 Anderson powerpole disconnects(yellow) for connection to the battery boxes.
    4. 1 Anderson powerpole disconnects (grey)for connection to inverter.
    5. New Battery Guard to protect the batteries from load.
    6. New Blue Sea ST Blade Battery mount fuse block.
    7. New USB charge ports connected to the Battery guard via the blue sea systems fuse block and switches.
  2. Two battery boxes each with two 6V Trojan AGM Batteries in series with a protection fuse to provide 12V and 215AH each box. with about 3 ft of 0/3 cable to connect to the distribution box.
  3. One “shore power” box with a KISAE 1000W pure sine wave inverter-charger with integrated transfer switch, with a 200A fast acting T-fuse on 10ft of 0/3 high flex cable.
  4. three foldable 100W solar panels and 30 ft  of cable to connect to the MPPT
  5. All this to keep my Bluebell Rocky Road Frozen during the next gulf coast storm.

Finally the USB ports also proved a easy way to check the battery voltage for overall system status.   It will also charge the phones without issues during an power event.   Switch on the left enables the Battery Guard, and the one on the right enables both USB ports.  I wonder how many times I can charge my phone with a 12V 400+AH battery bank?    I know it will run the freezer for 5+ days.

scopecreep
added switched USB ports


Once I get some extra blade fuses i can add circuits to the Blue Sea connection up to 4 total.   I may put in 12 V “cigarette lighter” plug to run the freezer direct without need for the inverter.    A final note the folks at donrowe.com were super helpful friendly on top of having great prices on inverter-chargers and accessories.

HP 2840 carousel brake solenoid repair

The new drum is installed, and I can finally close a project that  started a long while ago.   I really prefer fixing things to replacing them as it would just end up in the landfill.  Sadly you can buy a new LED “laser” printer for the same price as the drum I replaced.

The original issue was it was printing blank pages.  Is this a poor design on planned obsolescence?   After searching the issue on the internet for awhile I found a single post in  an HP forum that said.

“The latch can be fixed by disassembling the solenoid and cleaning off some sticky residue from deteriorated foam and replacing it with a thin piece of material. I use really thin felt stickers from a dollar store.”

This led to the picture you see above where the printer is disassembled all over the healing bench.   That little foam pad was way down inside the printer.  The solenoid was fine but the little foam pad was just a sticky spot.  It went back together and the little muffin pan had no spare screws left over.    That has been a great habit to use the muffin pan to hold the screws as you take them out.    It has reduced the lost  and leftover screw problem in my repairs.

It did fix the issue, but the drum had gotten some schmutz on it and after all of that.  The  print quality suffered a big stripe down the left side of the page.    I ordered a new one, and now am back in the printing business.   This is a relief as I had just put four new toner cartridges in and did not want to waste the $ as this old printer is a HP dinosaur but makes quality prints in color and has a great flatbed scanner that can be accessed over the built in network card.