Raspberry PiCase Overkill

Pi_case_finished

Scope creep is a project issue many of us have. I always creep when I decide to mix media of my hobbies. This one gets 3 of the many hobbies.

I started with the idea to build a simple plywood box to carry a Raspberry Pi and some associated tools for on the go hardware troubleshooting. What did I get? A leather wrapped treasure chest of troubleshooting tools. I wanted to have a “pirate chest” motif with a “sample case” style flap opening that could hold the keyboard and tools. It had to highlight the “edge grain” of the plywood too. I may have gotten close on the aesthetic I wanted, but the scope creep made this more than a simple case.

Pi_case_stuffed_messy

The Contents of the box before cable management.

The Raspberry Pi 4 is setup with the stock OS with my favorite Sigrok and pulseview setup for the fx2lafw compatible logic analyzer. Sigrok/Pulseview is my go to tool for troubleshooting serial, i2c, and 2 wire things. I have also added my buspirate v3 inside the case for good measure, but don’t mess with JTAG much anymore. Arduino IDE is also installed including the ESP32 and ESP 8266 stuff setup as well. More on those projects to come.

PiCase woodworking

I wanted to highlight the “edge grain” of the plywood, so I used my Milescraft saw guide to cut the 18mm (3/4 inch) Baltic Birch plywood into strips and re-laminated it back together to make panels that show the “grain.” That inexpensive saw guide amazes me with the consistency and ease of use for the small price. I then box jointed the bottom for extra glue area strength and inset supports for the contents. I left the top open so the leather skin could wrap and form a rounded top. I also decided to skin the outside of the wooden carcuss with 3mm Baltic Birch plywood for extra support of the leather. Of course I used Danish Oil on the wood because it highlighted the layers.

PiCase Leather work

Springfield Leather Company always confuses me. I bought a 2-3 ounce grade “D” veg tan leather side to use for structural reinforcement for some other projects from them. It was nice enough that I started dreaming up this leather case. The description definitely under sold the quality of this 33 square foot discount side. It will make great stiffeners for other things, but made some nice “show” panels for this case. I could not justify cutting up the bend area to get the brand mark on this case, but thought about it. These mostly clean panels came off the shoulder area. I love leather for the character that it was once a live animal. If I wanted perfect I would use vinyl.

A quick swipe with the strap cutter to make some accent strips and some Fiebing’s Pro Dye in chocolate. It made the accents and I tried a new Renia Aquilim 315 contact cement to assemble and attach the panels to the case. I do like the water based cement and did not have to get “high” to make this project. Saving the last few brain cells is always good. I added some copper cut nails as accents to add to my pirate motif, as well as some snaps and a buckle to keep the sample case flap closed. I of course treated the leather with my Leather Balm V0.1.

PiCase finsh

Pi_case_leather_installed

It was a fun project that started from a simple idea to a joecad 1 cm = 1 inch scale drawing. Oh yes, I mixed metric and “freedom units” in my build. I initially did a FreeCad mock up of a wooden case, before unrolling the leather and getting scope creep and deciding on changing my design from a simple plywood box to a leather wrapped treasure chest of troubleshooting tools. I may consider adding a TS80 USB Iron to the kit, but that is just more scope creep.

It will not replace my “lab” workbench but it is mobile.
K40 for the Holidays and votive lanterns.

Candle_lantern_Nativity_SBJ

I’ve been in an odd holiday mood, and I am just as shocked as those people who know me. I normally get my Humbug on early and finish strong, so this early season spirt is an odd one.

Candle Lantern

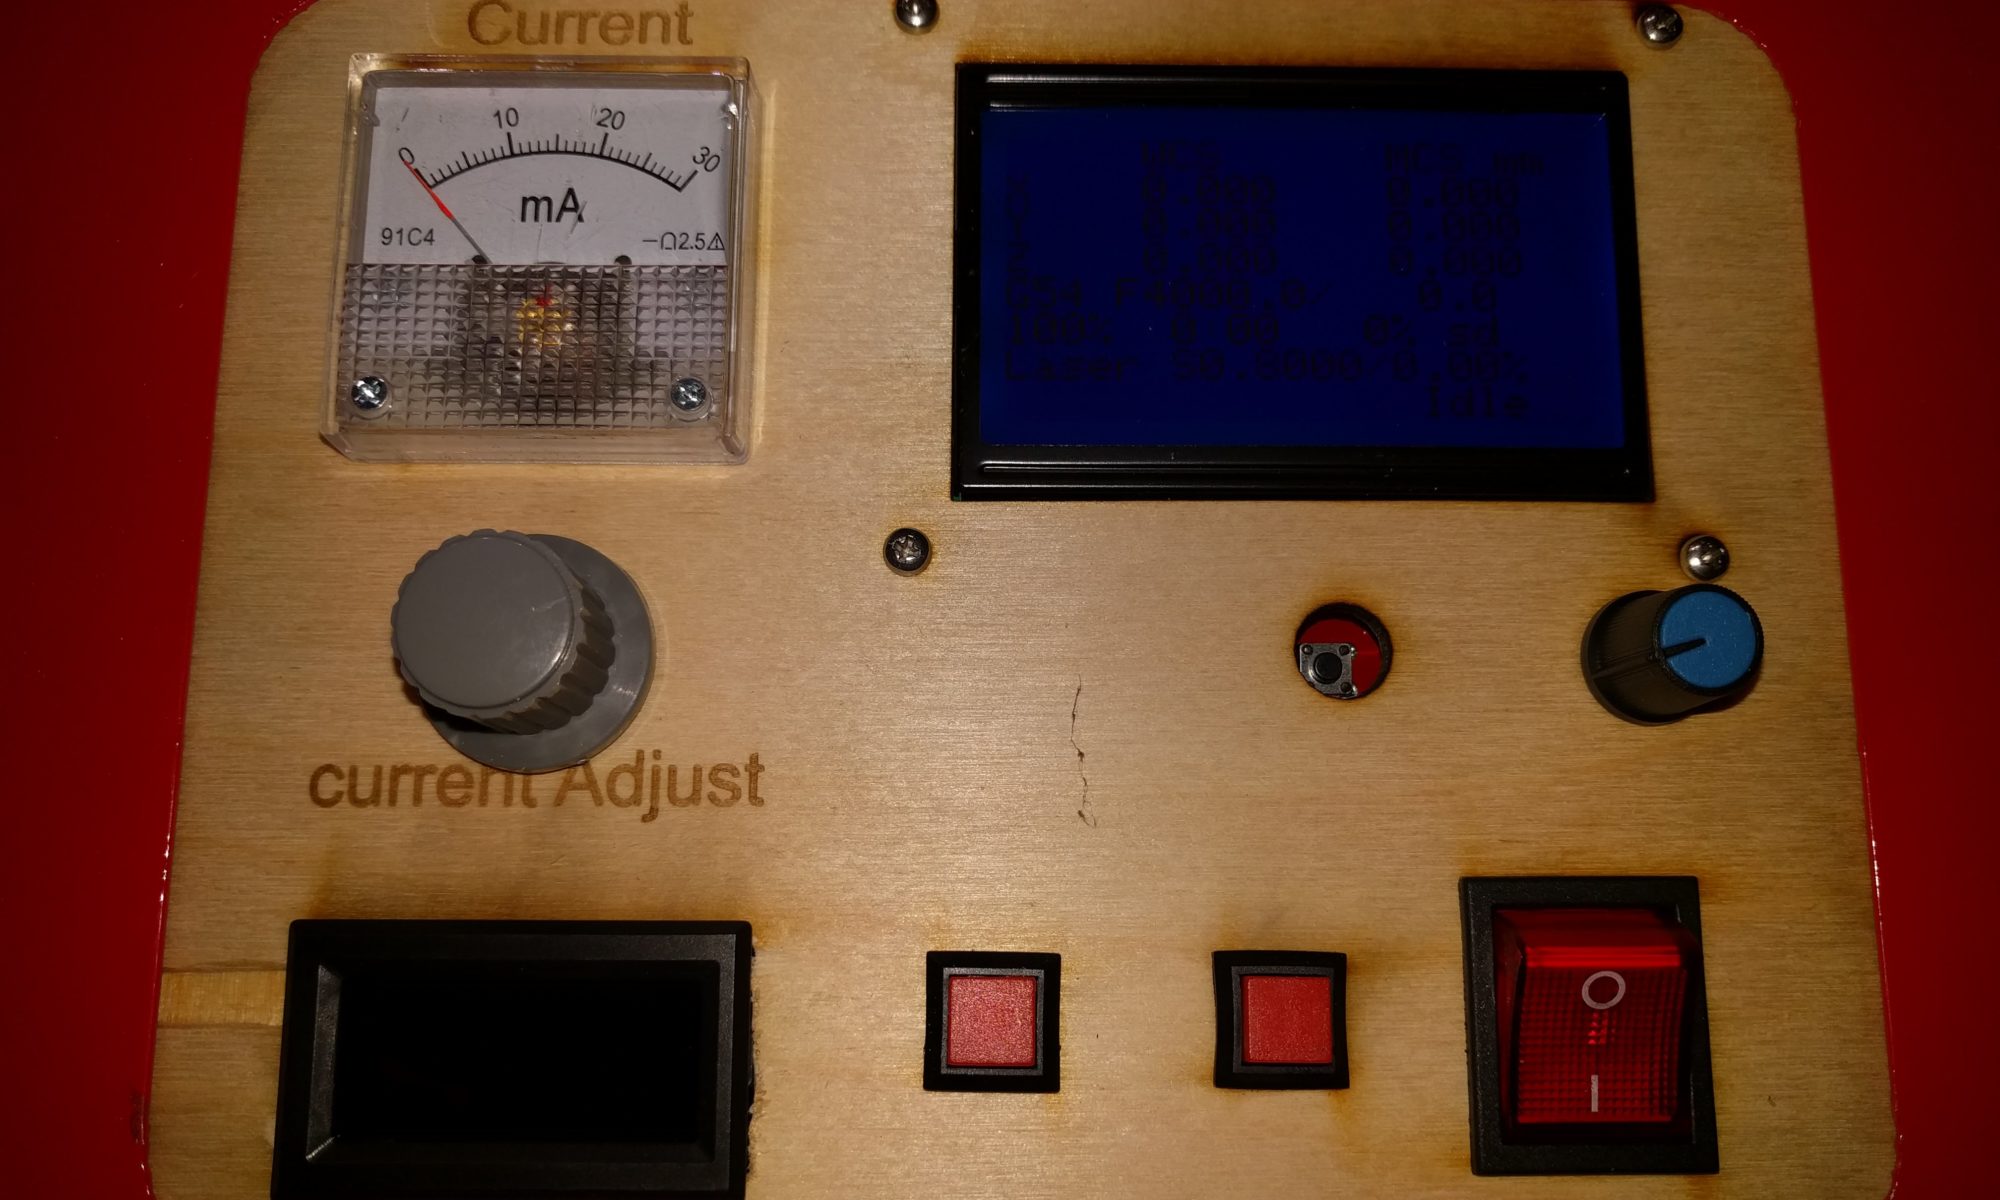
I have been kicking around the idea and did a quick search on thingaverse and found thing 2755535, “Decorative LED Votive Lantern”. I loaded the thing up in Lightburn and sent it to the Cohesion3d Mini I had installed in my K40. Like magic the samples came out, and fit up nice. I got some LED Votives for them for safety. They are pretty nice for the less than half a kong buck price if you buy a pile. You cannot get the coin cell batteries for that to make your own.

Nativity Scene Votive Holder.

So now to satisfy my Christmas holiday mood I found some SVG files on Pixabay.com. The first was a Nativity Figures which I added the Star of Bethlehem and remixed the Thingaverse model in Boxy-SVG. I then fired up the Orion Motor Tech K40 with mods and presto like magic. Three wise men and their 3 camels visiting Mary, Joseph, a shepard, and his live stock all paying homage to Sweet Baby Jesus. The openings display images on the room backdrop.

Bonus Holiday spirt for others

Not everyone likes Sweet Baby Jesus holiday themes, so I gave thingaverse a search and found thing 603237. The Tie Fighter & X-Wing Laser Cut Ornaments were a bit hard to part out as they have tabs. But once freed from the card Tree Ornaments were had.

Now to decide if I should rush out some samples to all the friends and family for the Holidays…..

Moravian Workbench part 3 of lots Joinery begins

Workbench end cap test fit

The Joinery begins now that the cut list is mostly complete with the lamination of the workbench top. I have avoided the tool tray parts as my bench will be longer that the plans. Once it is built I will figure out the tool tray and or extended bench. I got enough extra lumber to laminate a second bench top to make a complete top just in case I change my mind. I suspect I will go with a tool tray as I like having tools handy.

Workbench 3.1 Top Lamination cleanup

I got to work on flattening the main top and getting it square and true for the wagon vise build and install. I plan to get the top built and ready before starting on the legs. This allows me to use the top as a platform to work on the legs. I used my hand planes and winding sticks to get the top flattened and square on the front and back edges. I don’t plan on flattening the bottom unless I have to. Leaving the factory edge on the lumber on the bottom allows me to get almost an additional half an inch of bench thickness from the available “quarter sawn” parts from the milled construction lumber, therefore increasing the weight. The bench will get a final top flattening once it is done prior to top sealing.

Workbench 3.2 Wagon vise parts

Once I got the top square and true, I cut the parts for the wagon vise. The wagon vise parts are not really on the cut list but I wanted to get them done prior to going forward. I am going to make an unsymmetrical bench with an end cap on one end to increase the strength of the wagon vise and allow for a future tail vise conversion. This will allow me to fasten the wagon vise screw into something besides end grain, as well as give a bit more depth to ensure a solid mounting. The cap was laminated from 2 by 8 southern yellow pine. The rails and the carriage for the wagon vise are off cuts from the 7 eights white oak, the short stretcher are from. I also found that the pockets for the vise make a handy clamping fixture for cutting other parts since I don’t have a vise big enough to hold them.

Workbench 3.3 The Joinery begins.

Now that the top has been flattened and the end cap cleaned up from glue up. I started with the Rabate (Through Mortise) and Tenon that will connect the end cap to the workbench top. I decided to not be fancy here. I could have used a dovetail, but with the size I did not want risk a loose fit. I cut the Tenon by hand with my Ryouba saw and It was a learning experience to cut such a wide lamination to partial depth with this saw. Once the shoulders were cut I cleaned them up with a chisel and then a shoulder plane.

I then used my Cowryman Router plane to cut the start of the rabate. I switched to the Shoulder plane to clean the center of the rebate and due to the depth I had to bottom it out with a chisel. I was impressed by both planes as they made the 1 1/2 inch deep and 2 inch wide through mortise easy to do by hand. Both were very budge friendly vs some of the more well know brands and worked great. I have a power router, but decided against using it. I’m glad I did, and I do not think it could have made the depth with my available selection of bits anyway. Hand tools are very relaxing to me and why i returned to wood working.

I hope to finish the wagon vise build and test fit so I can ensure to plan that into the build of the legs. I suspect, I will have to clearance the short stretchers to accommodate the screw and rails from the wagon vise, as my top does not have the thickness to conceal it all internally.

Happy Accident Moravian WorkBench part 2 of lots

Happy Accident

I mentioned how much PBS I watched in my youth. Well as Bob Ross said “There are no mistakes only happy accidents” No amount of planing can correct rushing. I can make no excuse I know better. Layout test fit and ensure you have not only cabinet makers triangles as well as sharpie reminders on the end. What do I do but have a happy accident and laminate out of order. I laid out “top” up but laminate “top down” and so the order left to right got switched. Oops the wagon vise pocket is on the wrong side. Happily I noticed before final lamination, so I can hand cut a second pocket. This is happy because it forced me to ensure the wagon vise is closer to the edge. I had started to doubt using two layers of lamination from the edge. I feel 1 1/2 inches is better than 3 on distance from the edge for the wagon vise and dog holes. I also got to had cut the pocket without the circular saw kerf cheat used on the first one. More traditional and good practice.

Narex Mortise chisel to the rescue Work Bench part 2.1

A happy accident that I had ordered a new Narex Mortise Chisel from Lee Valley when I ordered the wagon vise screw. I know I have a tool hording problem, but it pays off sometimes. It was a great tool for cleaning out the pocket on the correct side of the bench for the wagon vise. It allowed me to make a pretty nice 1/2 inch mortise to aid in chopping out the pocket on the correct side. Practice in a place where it was not visible in the event I was no go with this method the underside of my bench. It came out well however. The final board held back from lamination that was to be the front could now be the front on the correct side.

Dual pockets allows flexibility Work Bench Part 2.2

A simple mistake made in a rush turns out to be a great learning experience and not a disaster. It allows me to in the future convert to a twin screw tail vise from a wagon vise if I learn that is not really my thing. I also learned to ensure if you layout left to right and flip. Remember to reverse the order on assembly.

Now on to do the initial flattening and cleanup of the glue squeeze out on the top, so the wagon vise parts can be double checked and cut and test fit. Once that is done. The legs and stretchers can be started from the pre-cut and surfaced parts.

Moravian Workbench part 1 of lots

A hidden Moravian Workbench

Well I had hinted at the fact that my mini bench on Kreg mobile project center just did not have the mass for the hand tool wood working I prefer doing. I am not a purist but I prefer the relaxation that comes from working with hand tools. I did use my dewalt 20v circular saw for some of the ripping as I am not a masochist, even if I could use the cardio of rip sawing 12 foot long Southern Yellow Pine construction timber, along the long axis, to usable pieces.

I had been searching for a bench design and ideas and came across the digital set from Popular woodworking. It not only included great reference books by Christopher Schwarz on workbenches. It had videos from Will Meyers on his revisiting the Moravian workbench found in Old Salem. I would love to go to the Moravian Workbench w/Will Meyers class at the Wood Wright school, but could not justify the dollars. I grew up watching Roy Underhill on PBS and was always in awe of his relaxed you can do this attitude. It would have been a great trip, but to be honest my skills are not up to the task of making the bench in a week with pure hand tools.

Workbench part 1.1 Sourcing Lumber

Since I decided to be budget conscious as My return to woodworking is still new. I decided a laminated top is the way to go. No full thickness hardwood for me. Roy Underhill and Will Meyers both have noted that good lumber can be had from wide 2 by 12 boards to be budget friendly. Mr Meyers also stated that the bench could be built for the approximately $500 range including hardware. I believe that as the materials cost for the class is $475. I will post my budget spreadsheet in a later update. It is looking very close so far. I am the cost of the fresh gallon of Titebond II I got on sale, over at this point including wagon vise parts.

So off to the Big box store I went. I went through an entire bunk of lumber and really should have considered the 2 by 12s like Mr Underhill recommends to get more width on final boards. I did find some that will do but once ripped down they were a bit narrow at a true 4 1/4 inches. One not so safe trip in a borrowed Pickup truck with a standard bed and twelve foot lumber. The lumber is at the house ready for the build.

Workbench part 1.2 Filling the Cut list.

Ripping down the lumber and filling the cut list. Plans and cut list are provided free by Will Meyers via Wood and shop. Since I am using Southern Yellow Pine Construction Lumber, I have to rip the 2 by 10s to near dimension and then laminate up pieces. I will use hardwood, as advised in the DVD video, for the short stretchers for durability, and have sourced some 7 quarter oak about 4.7 board feet for that and the additional wagon vise parts. I did use a handheld circular saw and Milescraft guide to rip the 12 foot boards down so only the “quarter sawn” style lumber was utilized for strength and durability. I am surprised how well the $9 guide works if you take your time. Yes a table saw would have been more accurate, but nine kongbucks cannot be beat. Then I laminated up some legs and the leg vise chop and back. Once the glue is set I will plane them down square and true ready for use.

Workbench part 1.3 Wagon Vise and Top Lamination.

I decided I wanted a wagon style vise in addition to the leg vise, as it fit the way I like to work wood. So I sourced a screw from Lee Valley who had the best price and in stock availability. You can get a wagon vise setup directly form Will Meyers or he has supplemental videos on his site, on using the very nice but expensive benchcrafted.com tail and crisscross vises on the Moravian bench. I did a quick scale drawing to incorporate the Lee Valley screw into my bench and did some basic clean out of the recess prior to lamination to reduce the size and depth of the mortise I would have to chisel. You can see the pocket in the partial top lamination below.

This is a bit longer that I should have gone, so until the next update.

Trestle Style SawHorses

Added Tusk Tennon

It was over a month in the making as I got distracted by everything to avoid the heat and humidity out in the garage. I did finally get the pair done. The first was finished almost a month before I got the second done. They are a custom sized slightly short to allow for hand saws. I have been using Japanese style pull saws, so need a slightly lower platform than the Kregg Mobile Project Centers I have been using. They will be much better that stooping over cinder blocks like I have been until now.

I selected the Trestle style to get to practice my joinery. The legs are mortice and tennon jointed with pegs. I included tusk tennons on the stretchers, so that they can be broken down into flat pack a bit thinner that folded “A” frames. The top rail is also on cross halving joint so that the can be replaced when worn out, or they are sacrifical during rip cuts.

I suspect my next project will be a heavy wood worker’s bench. I have been watching this video on Will Myers’ moravian Workbench, and I plan on building myself one as it is portable. The mobile centers are nice but lack the mass to do hand wood working even with my mini bench on top.

Prepare the stock

Doing the Joinery

Finishing up

Homemade marking guages.

ready for action

Now that I have a mini bench to work on.  More projects arise.  I decided I would like some marking gauges, and being too cheap to part with over 20 kongbucks for one.  I saw Stumpy Nubs video on homemade marking gauges.  Again my monkey see monkey do kicked in.  I was out tool shopping and splurged on an 7 kongbuck  piece of mahogany.  I had some red oak, and a hardwood dowel leftover in the garage from other past projects.

Mahogany at its finest.
fine chocolate shavings for the truffles.

A little glue to get some thicker pieces and some Ryoba saw action to get the 12 inch beams.  The pieces were ready for the mortises which I need the practice on if you saw mini bench you know I need the practice.

ready to cut mortise
glued the bodies to make them thicker

Well practice practice practice makes you better.  I’ll need much more before I can claim good let alone perfect.    A few brad nails for the scoring pins and onward to wax and make them feel good in the hand and add a bit more protection than the leftover Danish Oil from my hand’s oil.

just about to wax
ready set wax on…

Onward to more projects in wood.  I’m curious why the oak beam turned out so white while the oak block has the red tint.  cut from the same piece of wood.   Beautiful contrast either way.

A return to woodworking

mini bench

Everyone knows I have too many hobbies working with the lasercutter has caused me to consider woodworking again.    I suspect there is a Maslow CNC  in my future, but in the mean time.   I watched a ton of YouTube and saw this mini bench which started a flurry of copies videos.

Monkey See Monkey do kicked in, and I could not help myself, but I’m a cheap skate so no exotic woods for me.   Four x $2.80 “white wood” studs from the orange box store later.    I have my version of the mini bench.    Why so cheap?  Well a newb should not waste precious trees to learn on.

When I did wood working in the past I had a mentor, not now unless you count Essential Woodworking Hand Tools a wonderful book by Paul Sellers.  I bought the book and Highly recommend it.  He also has a ton of very informational videos  sharing his vast knowledge in an easy to understand manner, on YouTube or available at his site https://paulsellers.com/    I only wish his DVD’s came in the US region encoding, but I will survive on internet versions.   Much respect for someone who shares their knowledge and life lessons freely.   It makes us all better in the end.

I snagged a 6-1/2” Woodworking Vise with Bench Dog for $20 kongbucks to finish of the cheap build.  It works great onto of my Kreg portable workstation.   I left the sliding tail legs long so it would clamp down on top.   A single row of holes in the mini bench work with the vice in a tail position and the portable workstation’s included bench dogs.  Now with a place and a way to hold projects let more projects begin.

I learned a ton which is the whole point of making things.  Success with the jig to cut sliding dove tails without a table saw,  When I revisit this build.  I plan to cut them by hand with the lessons I’ve learned.  The tails came out straight and uniform.  Not so much success for the mortise or pins portion.   The make shift fence jig slipped and the gap was ugly in the front.  However the overall fit was very snug and took a mallet to get it all the way home.

Since the “white wood” is soft I did a few coats of Danish Oil to help protect it, but expect a work surface to take a beating.     Maybe I’ll do southern yellow pine on the next one.

crazy dovetail jig.
cutting sliding dovetails without a table saw.

dovetails
Large scale sliding dovetails cut with crazy jig.


sloppy work
Not pretty but a snug fit.