K40 gets some long overdue upgrades and testing

K40_overdue_updates_head

I have had some upgrades sitting on the shelf for a long time for the K40 laser cutter I got years ago. Some have been around since I originally got the machine, but I wanted to get all the life from the stock parts. I finally installed them.

The upgrades.

K40_overdue_updates_lenses
  • LightObjects Air assist head
  • 18mm ZnSe 50.8mm FL lens
  • fresh 20mm primary mirror
  • 5mp USB camera for Lightburn

Just a short list but they make a big difference over the stock 12mm lens and head. I got them installed along with a 5mp camera to pair with Lightburn to assist with object positioning.

If you are not running Lightburn software with your laser cutter. You should be. It is bar none the best with very responsive development team. I am a big supporter of open source, but pay for the license to support those guys. It is worth it, and my contribution via renewal barely buys them beers. You cannot go wrong for the price and what you get with a responsive development team. They read their forum and answer questions. The great folks at LightBurn also make their 3d model available for the 5mp camera holder, and will sell you one from their store if you don’t have a printer. It was a bit too tall for the LightObject Air assist head, so I had to go low profile with this model from Prusa Printers dot org. I’m still fiddling with the knobs on the calibration but visual location of cuts is going to be a game changer. I can cut small object from scraps now.

Testing the new Stuff

Prior to the upgrades my K40 had issues with living hinge cutting. It may have been my settings or focal length setting. However the new Air Assist head and Z-table combined to make a great hinge with minor scorching which was my big issue before. Charcoal does not flex well. Big shout out to DenzilMakes.com for the great test file box. You should check out his very nice work. There are lots of cool designs on the site. It made it look easy because he did all the hard work. There are even instructions on assembly available via his blog.

Sneak Peak for the future.

I did this long over due blog update while I was waiting for a fresh compile of OpenCV. I have been wanting to Open Computer Vision to convert stereo images to point clouds for a long while, for 3D modeling of real life. Well as a cheapskate, I could not justify buying a 3D scanner or Stereo Camera. What to do? Well check the parts drawer for what I have. A plain RaspberryPi zero and a RaspberryPi Zero W had been gifted to me years ago by a friend who wanted more power. I had some “Original” V1 camera modules to, well maybe they are knockoffs, but I cannot tell. The final physical piece was an OTG data transfer cable for cell phones. This will provide better resolution that my failed ESP32CAM attempt. I really should document failures too.

I got the basic Pi on the network by connecting it to the Pi W via the Ethernet gadget. I followed Adafruit’s guide for the most part. I had to do static IP addressing on the USB0 network on both of the Pies, and a little iptables forwarding. Note do not forget to enable forwarding in the /etc/sysconf.conf. I got everything working, after fighting with the camera cables a bit.

I then used Max Davaev of PiKVM’s great ustreamer to get the cameras accessible to the network for stream capture. This low latency streamer is just the ticket for the lightweight Pi’s, but full frame rate video may be a bit much for the available memory. Single image capture however is very responsive at full resolution.

I worked on my industrial design and worked on a FreeCad parametric model of a “case” for the things and it only took 3 revisions to get it usable. The cameras are 66mm apart or the normal human eye spacing, but the design will support up to 110mm for better stereo vision. I didn’t cut out the lens opening for the wider setting, but the design is parametric so one edit on the spreadsheet and a re-export and conversion of the STL into a SVG for the laser cutter. Props to tinker cad for the easy conversion from stl to svg via import and export.

I hope to update once I get some point clouds captured and converted to meshes. I hope to spawn the mesh processing onto the ARM BigLittle cluster which recently got a OS upgrade. end of word vomit… I saw a great makers site that is short sweet and too the point. I should really copy that style. “raw data for raw nerves

Early Spring Hydroponics Vinyl downspout system.

Vinyl_Downspout_Kratky_method_Net_cups2

Lets Get ready for Spring before Christmas! I already started some seedlings and ordered my spring seeds!

I do not deny that I watch a bunch of YouTube videos to find out how to do things. My Hydroponics endeavors are no different. My original hybrid DWC/NFT system was based on a video I saw. However, the cost of the vinyl fence post always troubled me. It is also special order at any big box store.

I recently saw the videos on “Keep on Growin’ with Mike VanDuzee” He is my kind of guy, always looking to reduce the cost of Hydroponic gardening. He has a series on using vinyl downspouts from the big box store to save cost. It easier to source and a bit cheaper that the fence post. I had to give it a go. I believe you can order pre-made units directly from him.

I also saw the “DakineApproaches” YouTube auto watering Kratky method reservoir indicators and had to add that as well. I could never thank BA Kratky enough for sharing his knowledge, and pushing me to learn more about not only design ideas but chemistry and nutrient utilization.

Let the making begin!

Vinyl_Downspout_Kratky_method_10ft_Honda

One quick trip the the Orange big box store. It always is amazing what you can stuff in a Honda Accord, like 10 ft vinyl downspouts and PVC pipes.

I decided to mix 2 and 3 inch net cups to provide the most versatility. One 10 ft downspout made into three 40 inch runs with net cups on 8 inch centers starting 4 inches from the end. I plan to use this for lettuce indoors as you can expect lettuce to bolt in the Texas heat. The larger cups can support Pak Choi as well. Lettuce will be a perfect Kratky Method crop. I just monkey see monkey do some rails to plant them in. Since I don’t have a yard at my house outdoor space is limited. The form factor is perfect for inside under the LED lights.

Vinyl_Downspout_Kratky_is_a_genus

Using the closed cell foam board in a pvc pipe to indicate fluid levels is as genius as the Kratky Method itself, and testing shows how simple it is. If you see the foam the reservoir has fluid.

All the skills and hobbies are tied together.

I did a quick mock up of an end cap in Lightburn and laser cut a test fit piece in plywood. I then cut out some acrylic end caps which are much cheaper that store bought fittings. I did not follow the example Keep on Growin’Mike VanDuzee where I first saw the downspout idea. He used a heat gun to fold up the downspout ends, but it leaves it open. I may convert this to hybrid DWC/NFT like the fence post model. I also am clumsy and don’t want any spilling inside. I also hate mosquito which TX has in spades. Of course I did not have any glue so 2 part Epoxy it is. It ran a bit and I will do a full leak down test as I am uncertain about the vinyl bond with the epoxy.

Now the wait on the seedlings begins, but he pak choi is sprouting.

K40 for the Holidays and votive lanterns.

Candle_lantern_Nativity_SBJ

I’ve been in an odd holiday mood, and I am just as shocked as those people who know me. I normally get my Humbug on early and finish strong, so this early season spirt is an odd one.

Candle Lantern

I have been kicking around the idea and did a quick search on thingaverse and found thing 2755535, “Decorative LED Votive Lantern”. I loaded the thing up in Lightburn and sent it to the Cohesion3d Mini I had installed in my K40. Like magic the samples came out, and fit up nice. I got some LED Votives for them for safety. They are pretty nice for the less than half a kong buck price if you buy a pile. You cannot get the coin cell batteries for that to make your own.

Nativity Scene Votive Holder.

So now to satisfy my Christmas holiday mood I found some SVG files on Pixabay.com. The first was a Nativity Figures which I added the Star of Bethlehem and remixed the Thingaverse model in Boxy-SVG. I then fired up the Orion Motor Tech K40 with mods and presto like magic. Three wise men and their 3 camels visiting Mary, Joseph, a shepard, and his live stock all paying homage to Sweet Baby Jesus. The openings display images on the room backdrop.

Bonus Holiday spirt for others

Not everyone likes Sweet Baby Jesus holiday themes, so I gave thingaverse a search and found thing 603237. The Tie Fighter & X-Wing Laser Cut Ornaments were a bit hard to part out as they have tabs. But once freed from the card Tree Ornaments were had.

Now to decide if I should rush out some samples to all the friends and family for the Holidays…..

LaserCutter Z-table upgrade

lasercutter_TX

Just a little catch up on the documentation of projects. I was not in a rush as Cohesion3D has pretty complete instructions on the upgrade. It is a LightObject Z-table for my K40 laser.

I had pretty much installed the Cohesion 3D controler day one, but did not get the z-table installed until later. I cannot stress how easy the Cohesion3D mini has made using the K40 with the optinal LightBurn license. The upgrade to Z table required a high current stepper motor driver as well as an extra power supply to handle the extra power draw of the Z-table but the link above for instructions covered everything. I also got a spotting laser and some honeycomb bed installed. The honeycomb keeps objects from falling into the void. Testing shows it was very capable after the install. I have some minor annoyances to resolve like it homes the z-table between cuts which can be a time waster.

Tooling Leather rabbit hole.

I had been watching leather craftspeople on Instagram and there is some much beautiful work out there.  I keep getting drawn in to try new things.     I have also been watching YouTube videos as well and it is amazing the amount of information people will share.   Don Gonzales at dgsaddlery  is one of those whos incredible work is an inspiration to learn new things, and he shares his knowledge and experience to make everyone better.  

That said I started learning a bit about leather tooling.   It is super relaxing and pushes me to be more patient.    My first serious piece is a simple basket weave belt, but I also started working on hand tooling from dgsaddlery’s patterns.   

Practice practice practice

I have also started looking at different tools and had to laser cut a testube rack to hold the tools.   I also tested non traditional colors mixed with antiques.

Intensity Gradient Testing

I got to spend some time with the laser cutter to test the engraving intensity gradient.    I threw in some cutting test in the final panel to test the inside dimensions of the cuts as well as the viable thickness of remaining material.   This was mainly done as a test of the Cohesion3D Mini upgrade with the LightBurn software.  The combination of these two tools is a great addition to Orion K40 laser cutter.  I will provide more details on both once on the controller and software in upcoming post, but I like them a lot, and have lots of plans for more upgrades involving them.

I did run into a small issue I suspect is a binding on the X axis, but want to ensure I follow up on all possibilities.  The image below shows some X axis dimensions loss in the center and right most panels in the final operations.   It is square but looks like some steps skipped and or were lost in the processing due to the testing of increasing mm/second.  I hope to find the issue with further testing.   Is it skipping steps or binding….

in the laser cutter

The positive note is that the kerf on a CO2 laser cut is tiny < 0.04.  The dimensions of the squares removed from the right most column outside dimensions (OD),  and the inside dimensions (ID)  of the holes, are all very spot on for size.    Much more consistent that 3D printing with filament.  The long rectangular cut outs reveal a 0.5 mm, 1.0 mm, 2.0 mm, 3.0 mm, and 4.0mm  bars left in the material after the cut pieces were removed.   the bars were slightly out of place due to the X motion skips but.   still square and strait.

The testing of concentric circles was also very good.

Industrial Design lessons II

I keep adding more tools to my tool box, and expanding the knowledge of the tools already in use.  It is why I have some many projects going on.  I want to learn new things or more about things I already know.  I continue to invest in learning FreeCAD.  The tool amazes me, each time I use it.  I find it better and easier to use.  Practice practice practice…  Pick a tool and use it.   Well I’ve been tinkering with Tinkercad too, but with some residual AutoCAD skills from my school days.   I am more comfortable in the FreeCAD interface and methodologies.

I had always used OpenSCAD either standalone on in FreeCAD workbench, as my go to design tool.   Today I started testing an new module LCInterlocking for FreeCAD.  It is why the open source community is so great.   Great tool and then people invest their time to make modules for it to make it greater.   This tool seamlessly integrated into FreeCAD and has its own workbench and easy to follow video tutorials.

I still need to work on my Industrial Design but the new box has better tab strength and a slot for all connection access.  It is a little less visually appealing, but I though the original revision the tabs were too small.  The kerf  on the cut was too tight and the box was very tight to assemble.  I may need to adjust the laser cutter’s focal length to prevent tapper in the cuts.

I know what your thinking.  I should have added a place to include the switches in the box with access like these.   That is why you build projects to learn new tools and how to best utilize them.  I will just use the painter’s tape to hold them on top for now.

Industrial Design lessons

I am not an industrial designer, but I need to refresh some of the basics basics.  I had gotten a driver board for some old LCD screens that were salvaged from a Lenovo W510 laptop which overheated.  It was a great panel with high resolution and good black.    The driver board was great and easy to use, but lacked any case.  I have been using it as an extra display for configuring my Ordoid and Raspberry Pi’s prior to adding them to the cluster.    I found it much handier that a full monitor for quick an easy configuration.

Now that I have a laser cutter I can make custom cases for project so I don’t have to leave things like the driver board on my desk like a hazard.  I mainly use FreeCAD, but prefer OpenSCAD for 3D part creation .  I have not yet reviewed  or updated sheet metal fabrication and card stock box techniques into the CAD world.  I had learned back in the mechanical drafting classes taken in my past.  Yes I’m old enough to have taken pencil and paper drafting classes.   I guess that will have to be updated.   What to do to create plans for cases….

I headed over to MakerCase to build a box.    If you have not used their tool it is super easy, and has great results as you can see.   However, my ability to measure and line up the ports was lacking.    I also missed the check box for “inside dimensions”  so a bit tight.  My only reservation about the tool is there is not size control on the output.    That is a minor inconvenience that InkScape fixed right up.

I wonder if I should do a rev 0.2….   For another day….

Laser cutter testing part1

When you get a new tool you want to put it to work right away, so i’m no different and made raspberry pi cases right out of the gate before doing more formal testing. I got the import laser cutter as a starting place from Amazon.  Please use link below.  It was well packed and shipped from California instead of overseas, so delivery was quick.

Orion Motor Tech 12″x 8″ 40W CO2 Laser Engraving Machine Engraver Cutter with Exhaust Fan USB Port

The object I used to first test was  Thingiverse thing 679809 it is a great case.   I did two in 3mm birch plywood and one in acrylic.   They came out nice the discount acrylic was a little thin so the case is a bit loose, but not too bad.   Wood cases were cut at 40%@40mm/sec and took two passes.   The Acrylic was cut at 60%@40mm/sec and took 3 passes.   I will definitely have to learn the best settings for the new laser cutter.

I will resume formal testing and adjustment of speeds and feeds.  I will also start documenting the upgrades I did to make the laser cutter mine.  This site is about tinkering after all so even if the cutter came complete ready to go.  I still had some upgrades in mind already when I bought it.

Now it has begun

The background shows my Orion Motor Tech 12″x8″ 40W CO2 Laser Cutter which started this whole mess.   Researching and finding upgrades for this machine is why I started this project documentation site.     It is far from stock and I only test fired the laser in the stock configuration before updates began.

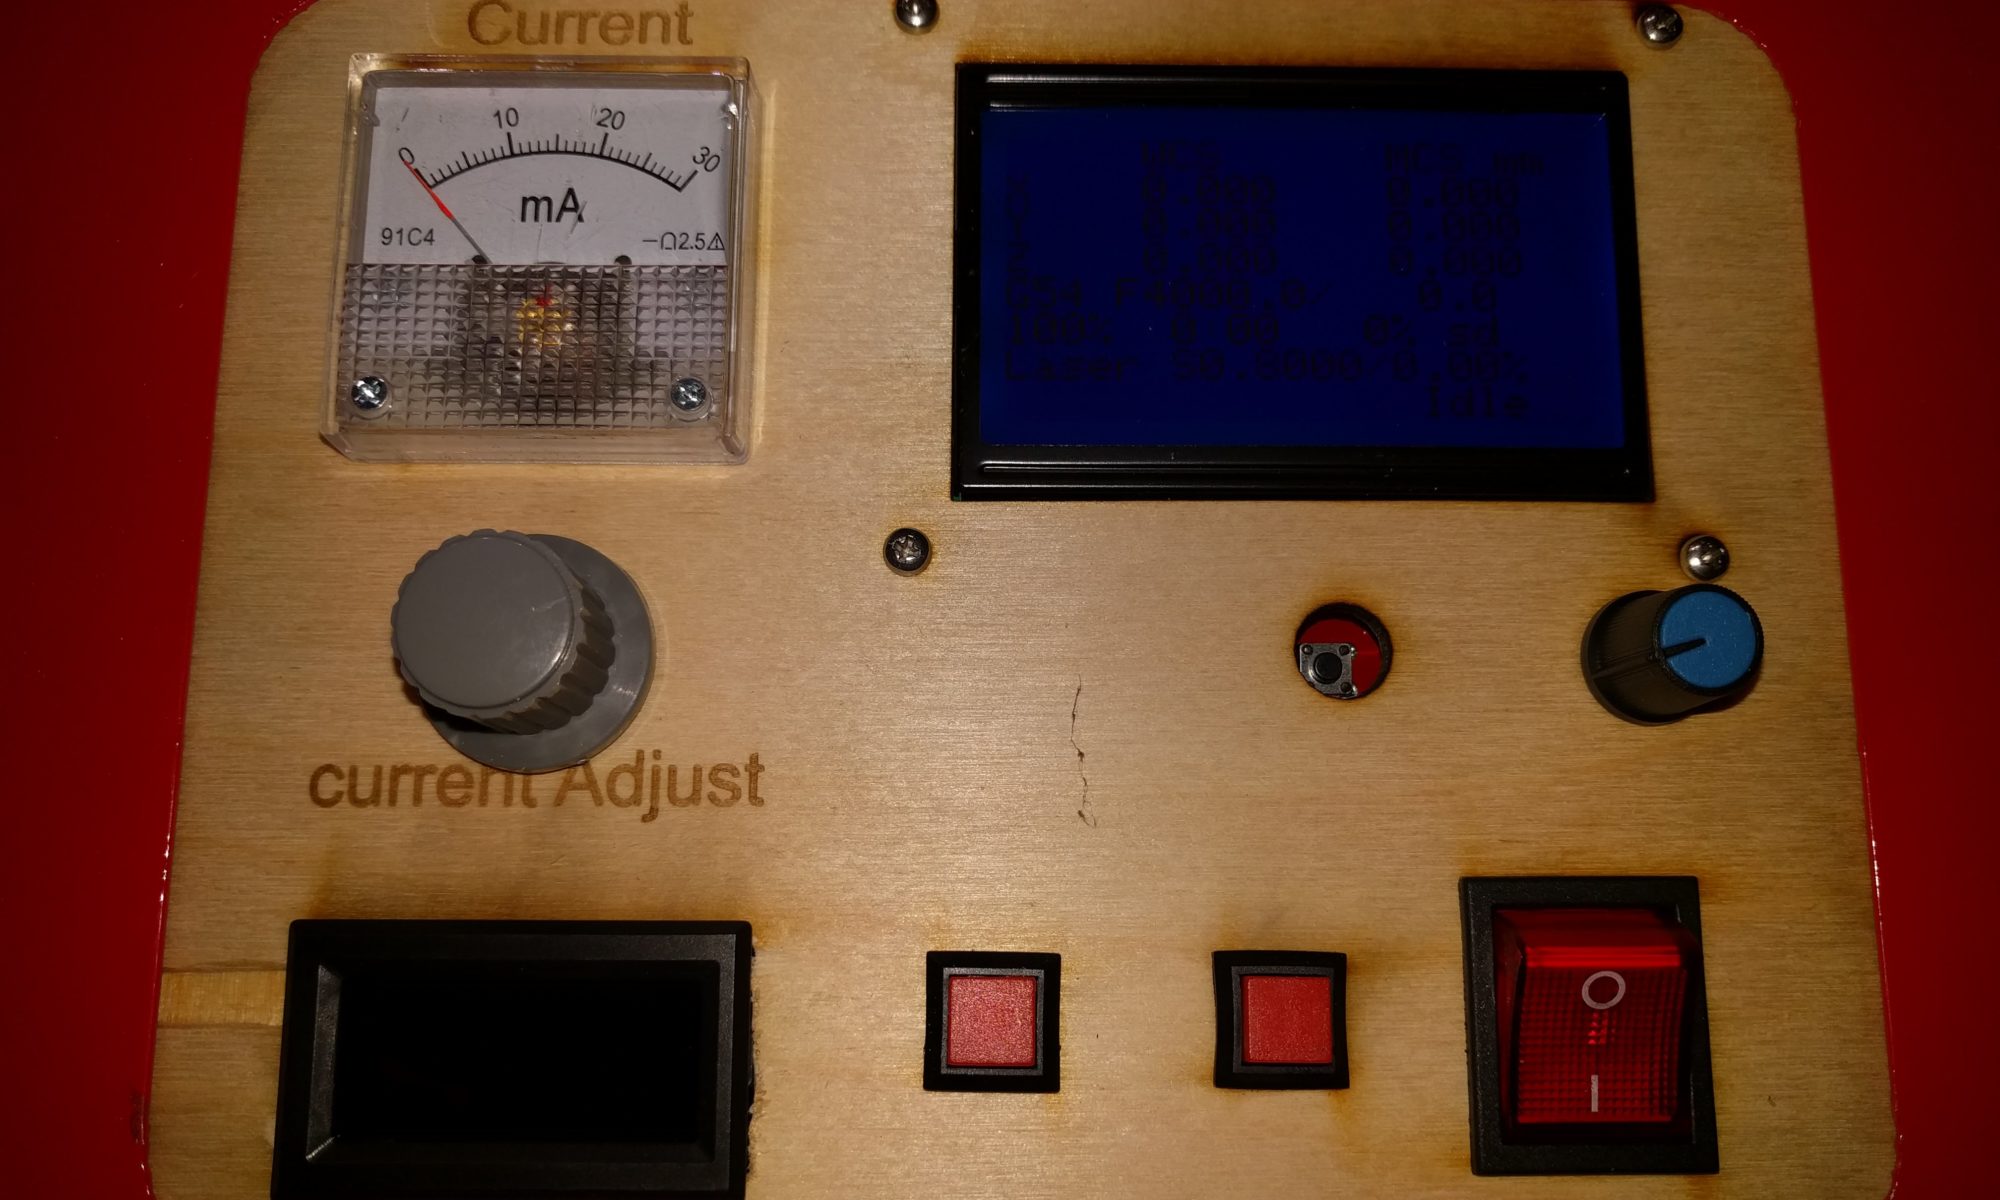
The first thing it cutout was the new front panel with new locations and items that I will document as I go.